
The days when unsigned RDP files could simply be accepted by clicking "Don't ask me again" are over. Since Microsoft's April 2026 security update, the rules have become significantly stricter.
Every time you open an unsigned .rdp file, you are now greeted with a red warning message stating "Warning: Unknown remote connection". Even worse, local resources such as clipboard redirection and drive sharing are blocked by default until you manually re-enable them for each connection.
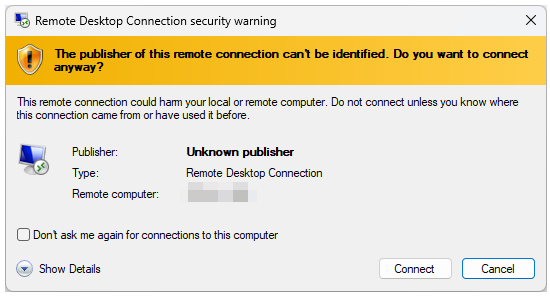
The reason for this change is security. Attackers frequently use manipulated RDP files as part of phishing campaigns. By signing your RDP files, your name appears as a verified publisher, and the red warning message is replaced with a standard trust prompt.

Prerequisites for Signing
You do not need to install any complex third-party software. Everything required is already included with Windows:
- rdpsign.exe: The signing utility located at C:\Windows\System32\rdpsign.exe.
- PowerShell: Must be run with administrative privileges.
- Code Signing Certificate: Either a self-signed certificate or one issued by an internal Certification Authority (CA).
- Your RDP File: The fully configured RDP file that you want to protect.
Method 1: Self-Signed Certificate (For IT Pros & Standalone Systems)
This method is ideal for environments without Active Directory. It is free and can be implemented within a few minutes.
Step 1: Create the Certificate
Open PowerShell as Administrator and create a new code-signing certificate. Replace the value in the -Subject field with your desired publisher name:
$certPath = "Cert:\LocalMachine\My\$($cert.Thumbprint)"
Import-Certificate -FilePath (Export-Certificate -Cert $cert -FilePath "$env:TEMP\rdp-signing.cer" -Force).FullName -CertStoreLocation "Cert:\LocalMachine\Root"
Import-Certificate -FilePath "$env:TEMP\rdp-signing.cer" -CertStoreLocation "Cert:\LocalMachine\TrustedPublisher"
Step 2: Establish Trust on the Local Computer
To ensure Windows trusts the certificate, it must be added to both the Trusted Root Certification Authorities and Trusted Publishers stores:
$certPath = "Cert:\LocalMachine\My\$($cert.Thumbprint)"Import-Certificate -FilePath (Export-Certificate -Cert $cert -FilePath "$env:TEMP\rdp-signing.cer" -Force).FullName -CertStoreLocation "Cert:\LocalMachine\Root"Import-Certificate -FilePath "$env:TEMP\rdp-signing.cer" -CertStoreLocation "Cert:\LocalMachine\TrustedPublisher"Step 3: Export the Certificate for Other Computers
If you plan to use the RDP file on other systems, you must also import the public certificate on those machines:
Export-Certificate -Cert $cert -FilePath "C:\Certs\rdp-public.cer"Import this certificate manually on each target system into the Trusted Root Certification Authorities and Trusted Publishers stores.
Method 2: Active Directory & Enterprise CA (Enterprise Solution)
Open the Certification Authority console (certsrv.msc), navigate to Certificate Templates, right-click, and select New > Certificate Template to Issue. Choose Code Signing from the list.
Alternatively, use PowerShell:
Add-CATemplate -TemplateName "CodeSigning"Step 2: Request a Certificate
Request the certificate from the workstation used for signing:
Get-Certificate -Template "CodeSigning" -CertStoreLocation "Cert:\CurrentUser\My"Step 3: Distribute via Group Policy
To ensure signed RDP files are automatically trusted without additional prompts, deploy the certificate through Group Policy:
Computer Configuration └ Policies └ Windows Settings └ Security Settings └ Public Key Policies └ Trusted PublishersYou can also configure the certificate thumbprint here:
Computer Configuration └ Administrative Templates └ Windows Components └ Remote Desktop Services └ Remote Desktop Connection Client └ Specify SHA1 thumbprints of certificates representing trusted RDP publishersPerform the Signing Operation
Once the certificate is available, signing the RDP file is a one-line operation.
First, retrieve the certificate thumbprint:
$thumbprint = ( Get-ChildItem Cert:\CurrentUser\My | Where-Object { $_.EnhancedKeyUsageList -match "Code Signing" } | Select-Object -First 1).ThumbprintNow sign the desired RDP file:
rdpsign.exe /sha256 $thumbprint "C:\YourPath\Connection.rdp"Conclusion and Security Considerations
Signing RDP files is more than just a way to eliminate annoying warning messages. It provides a significant security benefit. Any modification to a signed RDP file, no matter how small, immediately invalidates the signature. The red warning message reappears instantly, alerting administrators and users to potential tampering.
In enterprise environments, an Enterprise CA remains the gold standard because it provides centralized management and eliminates the need for manual certificate distribution. For ad-hoc scenarios or smaller networks, the self-signed approach offers a fast and effective solution to the restrictions introduced by Microsoft's April 2026 security update.
As a best practice, always sign RDP files as the final step after all configuration changes have been completed.

Sei der Erste und starte die Diskussion mit einem hilfreichen Beitrag.
Leave a comment
Dein Beitrag wird vor der Veröffentlichung kurz geprüft — fachlich, respektvoll und auf den Punkt ist hier genau richtig.